
")
Choose the best time of the day
Natural light is essential for interior photography. It is recommended to photograph the kitchen for real estate on sunny days between 10 a.m. and 3 p.m. Open curtains or blinds to let in as much light as possible and turn on all lights in the kitchen to brighten up darker areas. Remember to check for and replace any burned-out light bulbs.
Highlight unique features
Before photography, identify the kitchen’s unique features and plan to highlight them in your photos. These features include a stylish backsplash, high-end appliances, a farmhouse sink, or custom cabinetry.
Check the angles
Before shooting, walk around the kitchen and see it from various angles to determine the optimal camera placement. Furthermore, you should take photographs from multiple angles so the client can see the kitchen from all sides. Consider angles that highlight the depth and space of the kitchen, capture its unique characteristics, and avoid having your reflection appear on glossy surfaces or appliances.
Arrange visual elements
The arrangement of elements inside a picture is considered composition, an important factor in making your kitchen images stand out. It’s about how different scene parts interact with each other and the photo frame. In kitchen photography, good composition can make a space feel more balanced and inviting. Here are a few composition techniques:
rule of thirds
Like a grid, divide your frame into nine equal squares and try to position the kitchen’s most essential elements along these lines or at their intersections. This helps create balance and draws attention to critical parts of the kitchen.
symmetry
Use the kitchen’s inherent symmetry, like aligned cabinets or islands, for visually pleasing photos.
frame within a frame
Use kitchen components, like doorways or windows, to create a frame for your subject.
Consider leading lines
Leading lines in the photo direct the viewer’s eye to another point in the image, usually toward the main subject. In kitchen photography, you can use leading lines to grab the viewer’s attention to the kitchen’s main features or a specific area.
Best Camera Setting for Kitchen Photography
Most interior photographers choose digital cameras to photograph the kitchen for real estate. These cameras allow manual control over settings like aperture, shutter speed, and ISO. Also, DSLR or mirrorless cameras are proper due to their large sensors, which capture detail and perform well in various lighting conditions. The ability to interchange lenses is another important benefit these cameras offer.
Camera mode
The camera mode depends on the situation and your comfort with manual mode. During kitchen photography, you deal with different lighting conditions, perspectives, and details, so you have to choose the best camera mode that gives you control over the settings. Here are the most commonly used modes in kitchen photography:
aperture priority mode (A or AV on most cameras)
This mode allows you to control the aperture while the camera adjusts the shutter speed automatically.
shutter priority mode (S or TV on most cameras)
In this mode, you control the shutter speed while the camera adjusts the aperture.
manual mode (M on most cameras):
Manual mode gives you complete control over the shutter speed and aperture.
Adjust ISO
ISO controls the sensitivity of your camera’s sensor to light. A lower ISO number signifies less light sensitivity and less picture noise, while a higher ISO number means greater light sensitivity but more noise in your image.
When you are photographing a kitchen for real estate, you should keep your ISO as low as possible (usually around 100-200) to ensure the cleanest, noise-free images. Since you typically use a tripod and do not photograph fast-moving subjects, you can afford to use a lower ISO and slower shutter speeds.
In dark kitchens, if the lighting is limited, the aperture is too wide, and the shutter speed is slow, raising the ISO may be necessary to expose the image without blurring adequately. In such cases, try to stay below 800 to avoid significant noise.
Choose the correct aperture
The aperture you choose for kitchen photography will depend on what you want to achieve with your image. Here are a few guidelines to help you choose the correct aperture:
wider aperture (lower f-number, like f/2.8)
A wider aperture allows more light into the camera and minimizes the depth of field. A wider aperture can draw attention to a specific kitchen feature, such as a designer faucet or unique backsplash while keeping the rest of the scene softly out of focus.
narrow aperture (higher f-number, like f/8 or f/11)
A narrower aperture allows less light into the camera and maximizes the depth of field, which means more of the scene will be in sharp focus. It is the preferred setting for kitchen photography because you usually want as much of the kitchen in focus as possible.
Change the shutter speed
In kitchen photography, the shutter speed can be adjusted based on your lighting conditions and desired depth of field:
use a tripod
Since you’ll photograph a static scene, you can use slower shutter speeds without worrying about camera shake. This permits slower shutter speeds, ensuring precise images while allowing enough light to reach the camera’s sensor, especially in low-light situations.
balance with aperture and ISO
Use a slower shutter speed to allow more light into the camera in low light, or when using a narrow aperture and low ISO.
control ambient light
If your scene is too bright, use a faster shutter speed to limit the light entering the camera.
aperture priority mode
If you focus more on controlling the depth of field with the aperture, your camera automatically chooses the right shutter speed.
As a rule of thumb, avoid using a shutter speed slower than your lens’s focal length if you’re shooting handheld to prevent blur from camera shaking. For instance, if you’re using a 50mm lens, keep your shutter speed faster than 1/50th of a second, around 1/60. However, this rule is less critical since kitchen photography often involves using a tripod. Remember to adjust the aperture and ISO first, then set the shutter speed based on exposure.
Essential Equipment for Kitchen Photography
Some equipment is necessary for real estate kitchen photography, which includes:
Lenses
The lens you choose can dramatically impact how the kitchen appears in your photos. Wide-angle lenses (between 16mm and 35mm on full-frame cameras or 10-22mm on APS-C cameras) are popular because they can capture more space in a single photograph. This makes the kitchen appear larger and more open. However, be cautious of ultra-wide or fisheye lenses that can distort lines and create an unnatural perspective.
Tripod
For kitchen photography, choose a steady and stable tripod. It lets you shoot with slower shutter speeds, maintaining sharpness and detail, especially in low-light conditions. It also helps keep your framing consistent if you shoot multiple exposures of the same scene for HDR processing or exposure blending.
Lighting equipment
While natural light is often the best choice for kitchen photography, having additional lighting equipment is helpful. This could include external flashes, reflectors, and even continuous lighting. Off-camera flashes can help brighten dark corners, reduce harsh shadows, and provide more balanced lighting throughout the kitchen. Reflectors can be used to bounce light into areas that need it, and continuous lighting can help create a specific mood or highlight certain features.
You can also use a balloon to create sharp and optimal light; placing it facing the ceiling on the camera’s left side is better. Furthermore, you can put lightsticks on the floor and light specific parts, such as the table, island, or other kitchen parts.
Remember that even kitchens with large windows can be dark due to the wide dynamic range. To counter this, use exposure bracketing—taking and blending several photos at different exposure levels. Your camera’s Auto Exposure Bracketing (AEB) feature can automate this process, allowing for High Dynamic Range (HDR) photography without additional lighting equipment. This technique is a cost-effective way to capture high-quality photos.
Remote shutter release
This tool helps prevent camera shaking, keeping your photos sharp. It’s especially useful when you’re using slow shutter speeds or taking multiple exposures for HDR or composite images.
Examples Of Professional Kitchen Photography
These examples highlight how strategic kitchen photography can boost a property’s marketability by using different strategies in various situations.
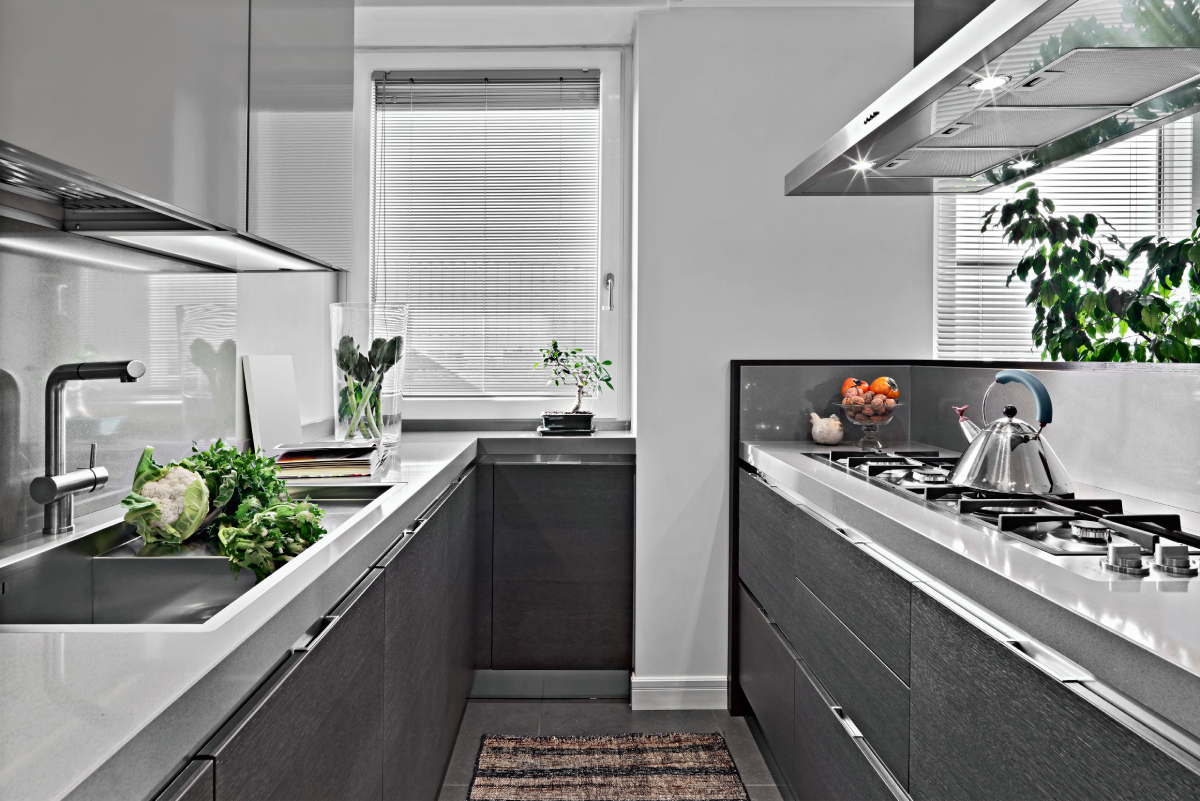
Small apartment kitchen
This example shows a small, narrow kitchen in an urban apartment. Despite the small size of the kitchen, the photographer faced the challenge of making it appear expansive and spacious. The photographer used a wide-angle lens to capture more space in one frame and shot from a lower angle to make the kitchen seem taller. Using brighter lights and pastel colors in the post-production process enhanced the sense of space. He effectively showed the kitchen as homey and useful by emphasizing its modern equipment and smart use of space.
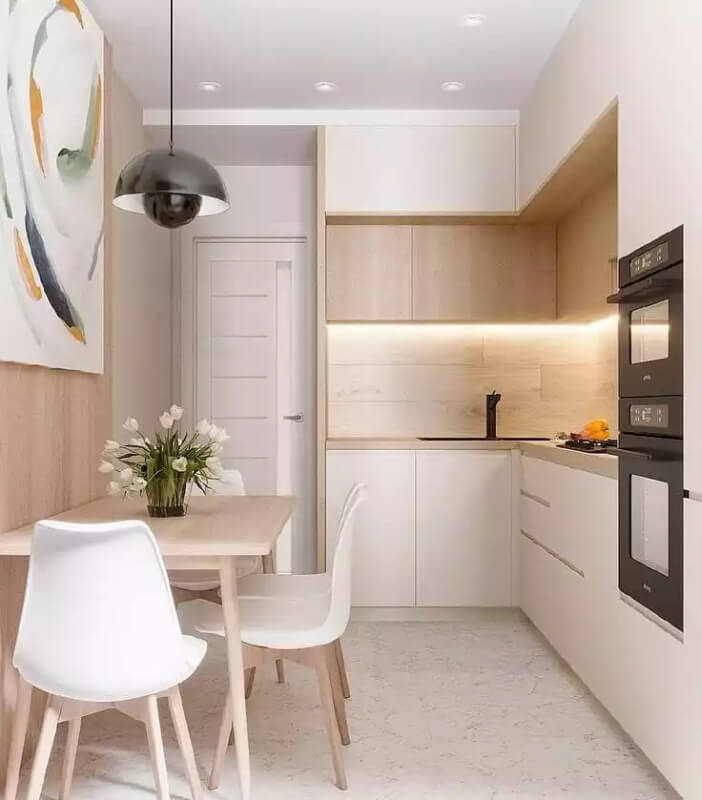
Source: www.extraspace.com/
Luxury kitchen in a high-end home
In this example, the photographer had to capture a large, luxurious kitchen in a high-end home. The kitchen was the home’s centerpiece, with top-of-the-line appliances, bespoke cabinets, and a large island. The main challenge was showcasing the size and grandeur of the kitchen without it feeling cold or impersonal. The photographer used a combination of wide and narrow lenses to capture the grand scale and intricate details, respectively. They also staged the kitchen subtly with fresh flowers, creating a lived-in, welcoming atmosphere.
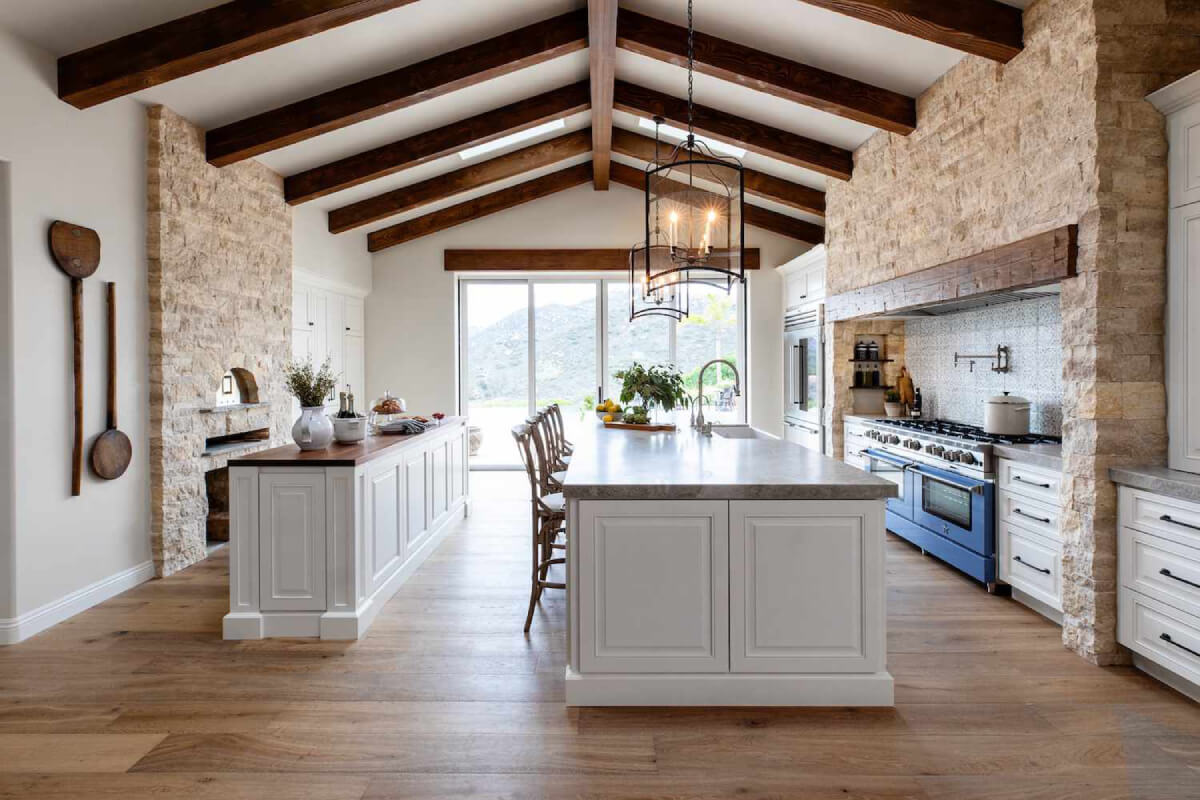
Source: thespruce.com
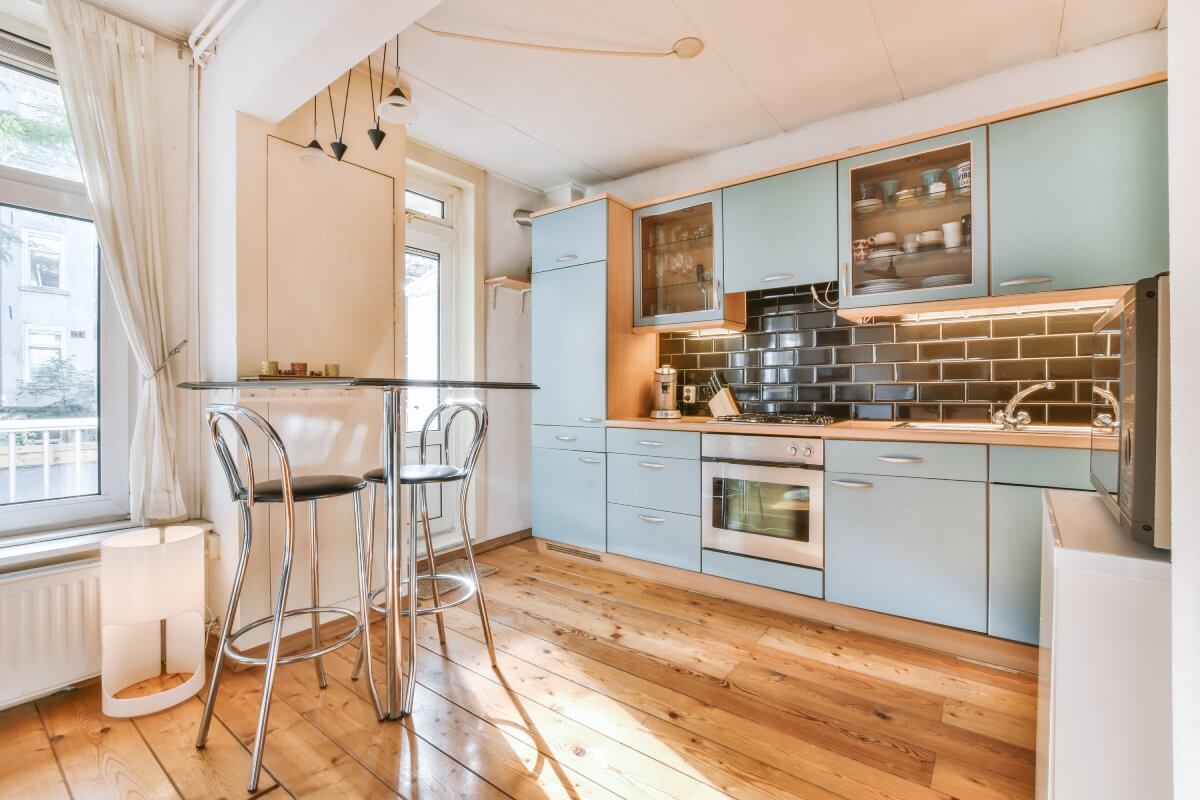
Renovated vintage kitchen
This kitchen was part of an old house that had been carefully renovated. It includes renovated original cabinetry and modern appliances, adding a contemporary flare to its vintage appeal. The photographer aimed to showcase the blend of old and new. The images successfully attracted a niche group of buyers who appreciated the mix of vintage charm and modern convenience.

Source: ashleysbuilding.com
Conclusion
Every kitchen is unique, and photographing a kitchen for real estate requires different approaches. Mastering kitchen photography involves understanding the right equipment, preparation, and technical skills. Proper camera settings—ISO, aperture, shutter speed—is as vital as techniques like leading lines and exposure bracketing. You must constantly practice and experiment to highlight each kitchen’s unique features and beauty and draw in prospective clients.
Remember to check images in real-time to evaluate image clarity; it also helps you make immediate retakes if needed. Furthermore, consider the benefits of virtual staging, a cost-effective method that enhances the kitchen’s appeal and allows potential buyers to visualize different styles and settings.