(1)")
“The volume and complexity of what we know have exceeded our individual ability to deliver its benefits correctly.”
It used to be all very simple. You’d take a camera in your hand or put it on a stand; you’d say: “Ready? shoot!” all you needed was a verbal confirmation or even a nod to make sure it was time to press the shutter. Today, especially with still and architectural photography, the notion of “being ready” entails comprehensive preparations. The real estate photography pre-shoot checklist is an integral part of preparing.
One might wonder why a real estate photographer needs a checklist. Real estate photography is not happening in the ER and under pressure. Plus, if you forget something, no one is going to die.
While that is all true, it still leaves the question open. Just because a job is not dealing with human lives does not mean you have nothing to lose and there are no repercussions.
So, we are not here to convince you that it works but to demonstrate why. So, we will elaborate on the logic behind effectivity of checklists and show you why they’ve become necessary in real estate photography.
First, we will take a look at tasks and items included in real estate photography pre-shoot checklists to clarify the subject. Then, we’ll analyze the function of lists and their usage by real estate photographers. By then, it would have become clear why it is essential to have them.
Let’s begin!
Table of Contents
What Is a Pre-Shoot Checklist?
Checklists typically entail actions or items required for completing a project or a job. In real estate photography, there can be multiple pre-shoot checklists made by the real estate photographer:
1. Pre-shoot checklist for the photographer:
Before taking up the camera, every list you make falls under the pre-shoot checklist. That usually includes the preparations required for the shooting; there are some tasks you must do before the shooting day and on the day itself before starting to photograph. Also, the gear you need to bring must be included in your pre-shoot checklist.
A typical pre-shoot checklist entails the following:
All the tasks you need to do, including:
- Finalizing the contract That is necessary for you to know the domain of your liability and the expected services.
- Getting liability insurance: To avoid future lawsuits regarding your services on the shooting day, you should acquire liability insurance. Keep in mind that if you use a drone for aerial shots, you’ll need separate coverage.
- Checking out the regulations: That is vital, especially if you offer drone photography. You must ensure that you abide by all the in-force rules.
- Examining the proper function of all your gears: It is best to ensure all your gadgets work decently to steer clear of a reshoot.
- Charging all the primary and spare batteries: A dead battery means no pictures.
- Inspecting the estate: Knowing the angle of the building and its surrounding can assist you in capturing the best shots, especially if you are dealing with a great estate. Additionally, you can see what alterations are required and can include them in the checklist for the owner/realtor.
- Preparing a shot list: You can list which rooms and features to capture to avoid reshooting.
- Arranging the setting for the shoot: you may need to alter the room setting or remove or replace some furnishing items to get the best composition.
All the gadgets you need to bring, including:
- Cameras: That include the primary photography camera and spares, 360 cameras, drone cameras, and their extras as well if you offer such services.
- Lenses: Unless you’re working with a zoom lens, you need to pack all the necessary ones to capture the interior and exterior.
- Tripod: Real estate photography deals with multiple lines; you’ll need a steady tripod to get them straight.
- Flashes: They are essential, especially for capturing all the necessary details of the interior.
- Chargers: Keep it safe by bringing all the chargers, even if you have charged everything the night before. Also, you may have multiple projects in one day, and chargers are indispensable.
- Triggers and remote control: if you have invested in these, remember to bring them with you. They are handy, particularly with interior shots where you may cast your shadow. Using triggers, you can remove yourself from the room and take a picture.
- SD cards: Since real estate photography requires shooting in RAW format, your memory cards get full rapidly.
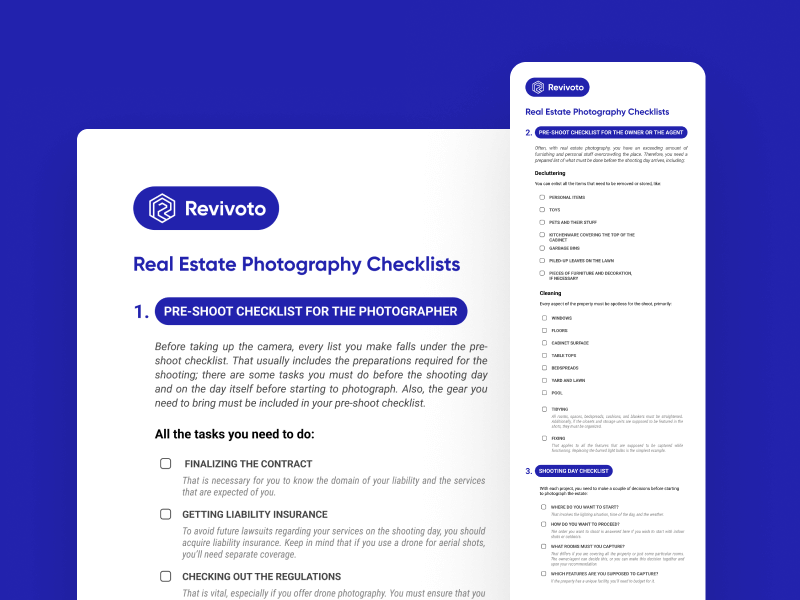
2. Pre-shoot checklist for the owner or the agent:
Often, with real estate photography, you have an exceeding amount of furnishing and personal stuff overcrowding the place. Therefore, you need a prepared list of what must be done before the shooting day arrives, including:
Decluttering: You can enlist all the items that need to be removed or stored, like:
- Personal items
- Toys
- Pets and their stuff
- Kitchenware covering the top of the cabinet
- Garbage bins
- Piled-up leaves on the lawn
- Pieces of furniture and decoration, if necessary
Cleaning: Every aspect of the property must be spotless for the shoot, primarily:
- Windows
- Floors
- Cabinet surface
- Table tops
- Bedspreads
- Yard and lawn
- Pool
Tidying: All rooms, spaces, bedspreads, cushions, and blankets must be straightened. Additionally, if the closets and storage units are supposed to be featured in the shots, they must be organized.
Fixing: That applies to all the features that are supposed to be captured while functioning. Replacing the burned light bulbs is the simplest example.
3. Shooting day checklist:
With each project, you need to make a couple of decisions before starting to photograph the estate:
- Where do you want to start? That involves the lighting situation, time of the day, and the weather.
- How do you want to proceed? The order you want to shoot is answered here if you wish to start with indoor shots or outdoors.
- What rooms must you capture? That differs if you are covering all the property or just some particular rooms. The owner/agent can decide this, or you can make this decision together and upon your recommendation.
- Which features are you supposed to capture? If the property has a unique facility, you’ll need to budget for it.
All these matters need to be sorted out. You can include these in your pre-shoot checklist if you have had time to inspect the property. Otherwise, you can prepare a shooting day checklist; you make this list to avoid repetition and confusion on the day. You can alter its priorities at the property based on the timing and lighting.
Now that we’ve clarified the content of real estate pre-shoot checklists, let’s see what makes these lists practical.
Logic Behind Real Estate Pre-Shoot Checklists
The general objective behind checklists in all fields is to get the best outcome. With any checklist, we are dealing with our cognitive capacity since our brain takes charge of fulfilling the lists. To understand the reasons behind practical checklists, we should illustrate our brain activity when dealing with checklists:
1. Better function under stress
Every job deals with its own levels of pressure. As a real estate photographer, you are obliged to deliver a certain amount of high-quality listing images upon a set deadline. Since the subject of your work is still, you have limited control over its status and setting.
When you have a prepared checklist, you can free your mind from the anxiety of possibly forgetting something. This way, you can dedicate your attention to your primary job.
2. Faster processing
Research shows that our brains process images 6 to 600 times faster than texts. A checklist is an effort to bring textual content closer to a visual one. You have several tasks on one page with short sentences. The brain can grasp the subjects listed at a glance.
Therefore, a concise yet comprehensive pre-shoot checklist enables you to do your job faster without sacrificing its quality.
3. Optimizing the memory
Real estate photographers are supposed to capture the potential of a property in a couple of hours. Each estate has its unique floor plan and structure that builds its selling power. Forgetting to shoot all the rooms and special features can result in listing images that won’t make much difference.
Since real estates are not 100 percent identical to one another, a comprehensive list guides our memory. A list of the essential rooms and features to shoot acts as a reminder for our brain, and we can alter it with each property, reminding us of its unique characteristics.
4. Reducing the margin of error
No matter how good you are at your job, errors can happen. Studies have shown us that when our minds are overwhelmed with data and processing, the chances of making mistakes rise. Real estate photography has various out-of-control factors like the weather, the angle light hits the property, and the unwanted items on the estate. These can all lead to errors on the shooting day.
A pre-shoot checklist allows your brain to prepare appropriately and perform at full capacity.
Conclusion
We know that real estate photographers are magicians who tell the story of a house through rigid frames. Nevertheless, professional magicians always have an assistant. A well-prepared real estate photography pre-shoot checklist is your assistance before and during the shoot. It allows you to focus on your job and take advantage of all aspects of your knowledge and expertise.
FAQ
Generally, it is best to go for an f/8 Aperture. You can lower your camera’s aperture stop with singular aspects of the property to f/2.8 to capture unique features of the property. That enables you to get all the details of your subject while blurring the background.