
")
Real Estate Photo Editing Methods to Enhance Property Pictures
Your real estate images won’t always come out perfectly, even with the greatest tools, the ideal settings, and the best expertise. Lack of illumination, clutter, intense colors, and harsh shadows are some flaws to fix.
In real estate photography, it is essential to provide high-quality photographs to entice homebuyers. Because of this, every real estate photography firm must include real estate photo editing in their marketing efforts.
It allows you to change the image in several ways, such as increasing the colors, eliminating objects, adjusting the lighting, altering the settings, and more. Using Photoshop, Lightroom, and other picture editing software, you will be able to get the “ideal” aesthetic you’re going for. The following pointers will assist you in determining what needs editing and what does not.
What is allowed?
- Basic light and color modifications
- Perspective correction
- Object removal
- Sky replacement
- Noise elimination
- Cropping
- Vertical and horizontal straightening
- Blemishes elimination
- Tone adjustment
- Flash reflection removal
What is not allowed?
- Permanent fixtures removal
- Altering the background
- Incorrect presentation
The skills of real estate photo editing assist you in increasing your prospects and buyer interest, as well as your sale price and reputation as a real estate professional.
Tips to Use Lightroom to Edit Real Estate Photos
You can use Lightroom to edit real estate photos. Since the software offers several exceptional capabilities that few picture editing programs have, such as cropping and naturally deleting unwanted items. Lightroom features incredibly realistic and vibrant picture editing effects. Additionally, you can be certain that all edited photographs are extremely clear and not blurry.
When learning how to edit real estate photos in Lightroom, you must be aware of the following tips to ensure that the edited image is attractive, bright, and sharp to draw everyone’s attention.
- To edit several similar photographs at once, use Auto-Sync
- To attract home buyers, edit photos in a modest and natural manner
- To get started fast, use Lightroom Presets
- To make the design simpler, use plug-ins
Step-By-Step Instructions to Use Lightroom to Edit Real Estate Photos
Photographers, in general, and real estate photographers, in particular, should be well-skilled in post-production editing techniques. These methods allow you to quickly and easily create professional-grade photographs for your listings. To edit photographs with Lightroom, follow the steps below:
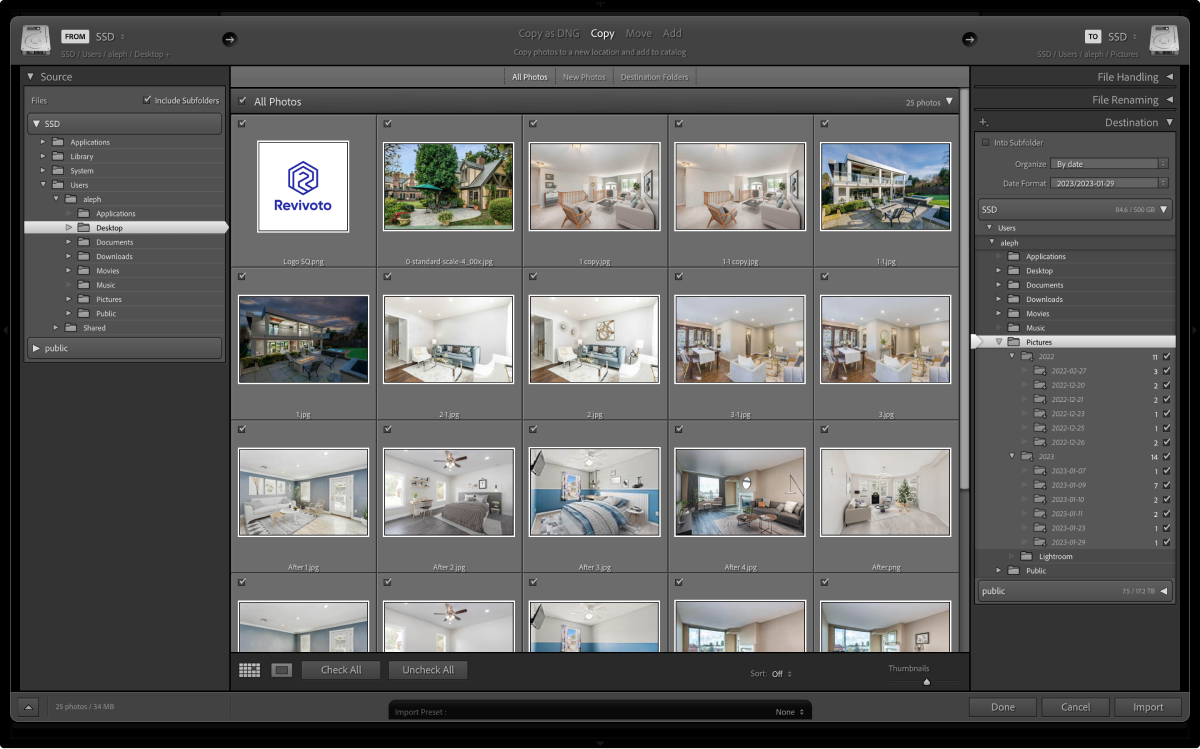
1- Import images into Lightroom
Select new photos and import them into Lightroom. We recommend shooting in RAW format. The RAW file format, as opposed to JPEG, records every bit of picture data that the sensor is capable of recording. However, JPEG uses compressed information. Photography professionals must always shoot in RAW.
Using RAW, you can address issues that you may not have been able to with JPEG and make high-quality photographs. Moreover, exposure correction is simple with this software. With RAW, you may edit without modifying the original data, thanks to non-destructive editing.
Place the SD memory card into the designated slot on your PC after selecting New Photos to import only brand-new pictures.
Fullscreen
The location where the photographs are imported into Lightroom can be selected on the left.
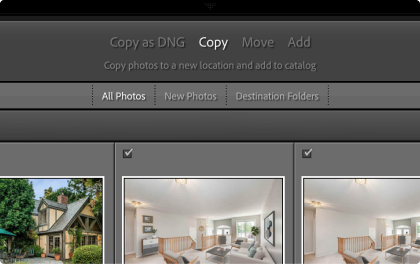
Import options
just choose Copy and the option for New Photos below. The New Photos option ensures that photos previously imported into Lightroom from a memory card are not imported again.
Additional import settings
This is where the pictures will be placed:
build previews
Embedded and sidecar
build smart previews
Choose this option to generate previews that load much faster and save time.
don’t import suspected duplicates
By selecting this option, your request that Lightroom check for this.
make a second copy
Choose this option.
add to collection
Don’t choose this option right now; pick this one later.
Apply during import
Do to all of your photographs, which Lightroom does upon import. This allows you to end up with photographs that are on their way to completion immediately after import.
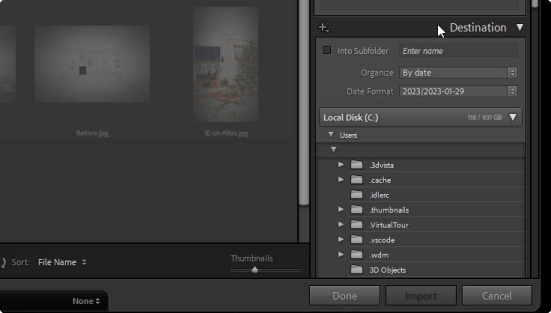
Destination
You can sort and organize photographs in Lightroom using several settings, such as by date.
2- Use import presets on all photographs
Lightroom has remarkable automated features, such as developing presets. You can make custom presets and use one of them with every image you import. Here is the import presets:
Basic panel
Things you can manually do to each shot that Lightroom does automatically.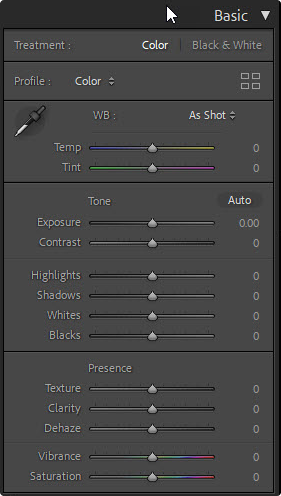
Detail panel
Every shoot may use the same camera and lens, and the same level of fine-tuning is possible.

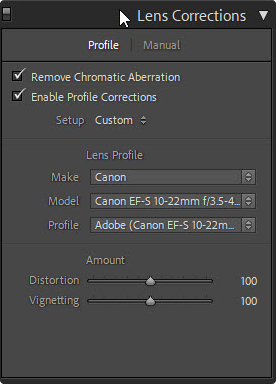
Lens corrections
Here, you can select the model of your lens, and Lightroom will perform the necessary optic adjustments.
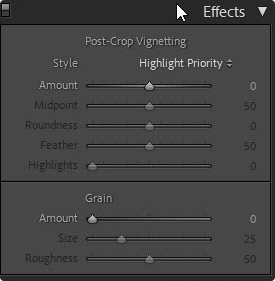
Effects
Add a vignette to each image, play with the sliders, and darken the corners and borders to emphasize the center.
3- Take backups of your files
A duplicate set of photographs is added to Lightroom on your PC hard drive, the Lightroom Catalogue on an external hard drive, and an external hard drive when you import images. Thus, the photographs are already stored in three locations, including the memory card.
It is preferable always to have an automatic cloud backup going in the background. By doing this, the pictures are transferred to an additional external hard drive kept off-site before you erase them from a memory card.
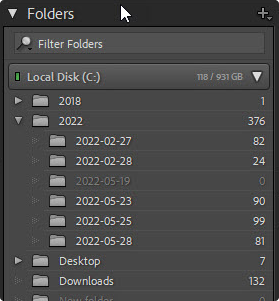
4- Arrange the images inside the Lightroom Catalog
Here, you can create folders and organize your files according to various names.
5- Place the photographs in stacks
If you shoot HDR, it implies that each shot has three photographs. You can combine them in Lightroom by utilizing the HDR Merge feature. Remember that the first picture in each set of three is on top of the stack, allowing you to view just that image.
6- Select the images you want to edit
Browse through the photographs one by one, using P for choose and X for reject. Then, you can create a folder named Picks and transfer chosen images. Now you have the images you want to edit.
7- Edit the photos
transform/ crop
Crop the first picture, then go to the transform panel to ensure that the horizontal and vertical axes are correctly aligned. Therefore, crop first, correct the horizontals, and then check the verticals.
8- Edit the photos using the Basic Panel
Lightroom offers various panels to work with, including the Basic Panel. The panel features include the following:
Treatment
It is used to alter color or black and white.
Profile
You can use Adobe Colour or other profiles.
WB – White Balance
You can set the white balance in one of two methods, and doing so is crucial since it determines the colors you’ll see in the final product.
Eyedropper tool
Click on this tool, located under the word profile, and then drag the eye dropper to a neutral color. A dialog box titled “Pick a neutral target” will show up. Move it around until you find anything with identical three-digit numbers, and then click on it. The same numbers within 2 or 3 are acceptable.
Select a white balance preset
If the preceding steps are followed, the term becomes custom. When you click it, the white balance settings will show. The white balance can then be copied and pasted to every other photograph where the lighting conditions are identical.
Auto button
Auto is the next button to the right of Tone. You could use auto and then modify this if you want.
Exposure
first, adjust the exposure to +2, then to -2.
Shadows and highlights
Visual adjustments, but Lightroom will attempt to set them for you if you double-click on the bit in the center while holding down the shift key.
Whites and blacks
The same as before.
Texture
It’s an excellent choice for enhancing the textures in outdoor shots but not for inside photos.
Clarity
Begin at 25 and work your way to the right. 15 to 35 might be optimal.
De-haze
It eliminates haze in a scene. It is effective in very hazy conditions and for landscape photography but less for real estate photography.
Vibrance
The saturation slider intensifies the less visible colors of a photograph.
Once the first picture has been edited, you can apply the same edits to the others if they are comparable. You could copy and paste the alterations made to the initial image onto subsequent images.
The other method is to choose the picture with the changes you want to apply to the additional photographs, select all the images (in the film strip using Control A), and press Sync.
HSL/ Colour Panel
This panel is used mostly for scenery and travel photography, as well as high-end architecture photography.
Detail panel
This is already established upon import. Check and adjust the Amount slider to compare the first picture.
Lens Corrections
Already done with import.
Transform
Try Auto. Using Guided, you position vertical lines, and Lightroom applies them to the image. Then try Full. Instead of sliding the slider, click on the blob in the center. The right and Left arrow keys correspond to + and -, respectively.
9. Remove stuff
The spot removal tool is located at the top. It is the arrow-shaped circle to the right of the crop tool. Using this and the Visualise Spots at the bottom, you can eliminate dust spots generated by dust on the sensor. You can use Photoshop to erase large spots.
10. Finishing touches
The Radial Filter is located to the right of the Spot Removal tool. It could be used to highlight the façade of a building, making it somewhat lighter. Choose the tool and drag a shape around the building. Select Dodge to lighten, and then select Invert to apply the modification to the inside of the object rather than the outside.
11. Apply metadata
Add metadata and a few keywords, and rename the file to correspond with the shot.
For example, Building X Shoot, 31122000 001
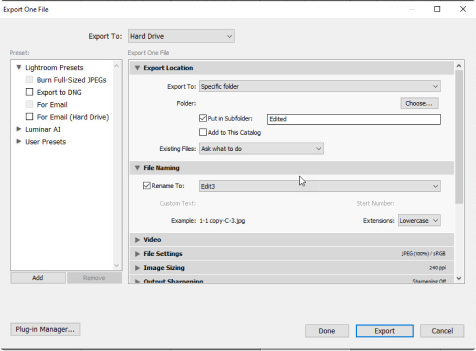
12. Export the images from Lightroom
Do more variables, compress photos, and export them.
Picture
13. Issue the photos
14. Sort out the digital files
15. More things to do
Modify the brightness
Make sure your images are exposed properly, and if they aren’t, just drag the exposure bar to recover it. Also, modify the contrast to give your picture more impact.
Adjust the shadows and highlights
To get rid of the exposure hotspots, slide the highlights bar to the left. You can alter the picture by raising the shadows bar to reveal hidden elements in low-light areas.
Improve the white and black
To extend the brightest whites, hold the Alt key on Windows or the Option key on Mac while sliding the Whites slider to the right. Holding the same keys, move the slider to the left until the black portions of the image begin to appear.
Add the clarity
Move the clarity slider to add some clarity to the picture.
Edit photo warmth
Move the temperature slider to the left if your photograph seems too warm.
Desaturate some of the colors
Select the saturation option by scrolling down the HSL/Color/B&W menu. To desaturate or over-saturate a single color without impacting the rest of the picture, click and drag the small clicker box, then select the area to be desaturated and drag the mouse down.
Adjust noise reduction
Set the noise reduction based on how far you dragged your shadows up to sharpen your picture.
Lens correction
There are options for lens correction in Lightroom. Select all of the boxes under lens correction, and then click the vertical correction button.
Conclusion
Nowadays, with all these cutting-edge tools, real estate photo editing is better than ever before. You can use Lightroom to edit real estate photos to simply enhance your images and grab buyers’ attention in order to sell your home quicker. This program is an excellent way to manage digital photographs and data, and it also offers the most advanced photo editing abilities accessible.