

Gear Up (Pre)
It doesn’t have to be a whole range of gadgets and gizmos of plenty from the beginning. Start with the basics and expand as you settle. Founding members of your real estate photography career are a Camera, lens, flash, and tripod.
Camera:
The quality of these instruments depends on your budget. You can check out suggested cameras for real estate photography on Revivoto to see which one fits.
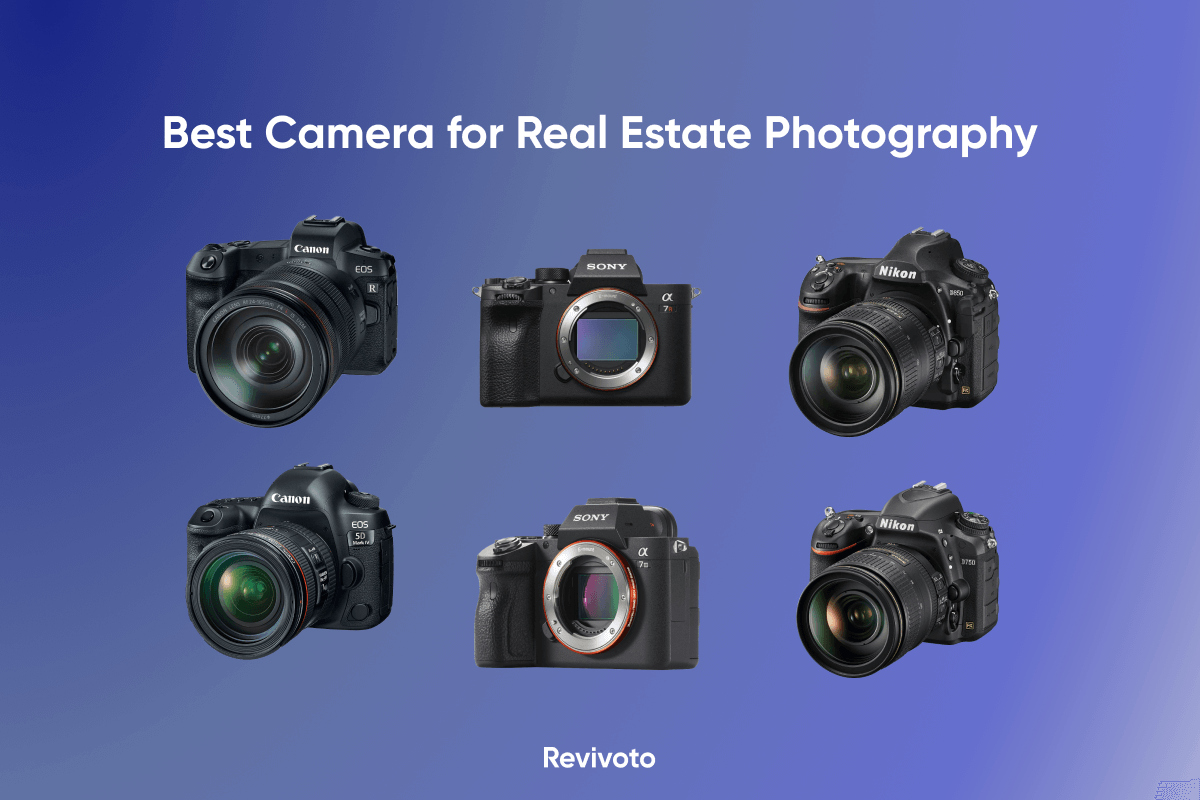
There are two major categories for your choice of a camera:
DSLR or mirrorless:
The viewfinder is where these two types of digital cameras diverge. SLR, or Single Lens Reflex, has a mirror inside where the light hits. Then it finds its way to an optical viewfinder, and you’ll see precisely what is out there. Mirrorless, on the contrary, has no mirror, and the light gets to the sensor directly. Here we have an electronic viewfinder that shows how the view will be captured. In other words There are pros and cons to both types and picking one depends on personal preferences and your budget for new gear.
Full frame or cropped sensor:
Real estate photography deals with vast views, especially with the exterior. That is why we recommend a full-frame camera. They are a better fit for capturing all aspects of the properly.
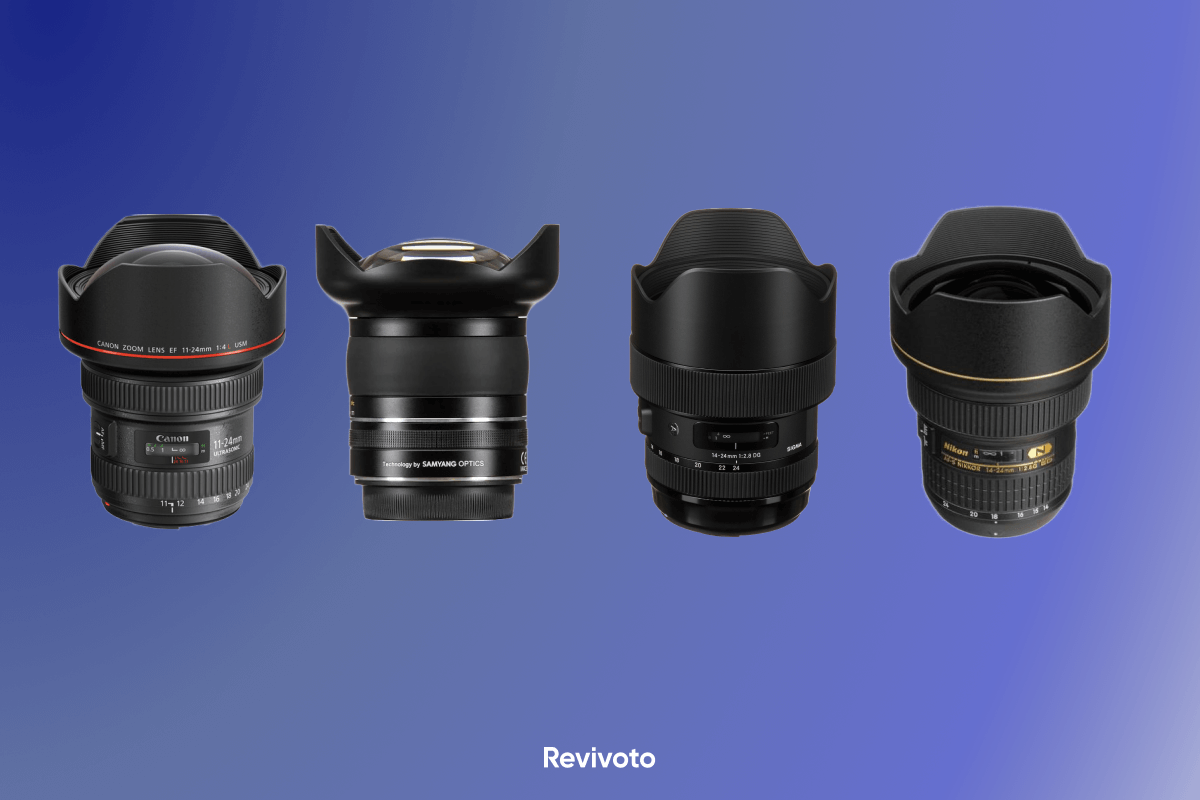
Lens:
real estate photography entails capturing various spaces, which fits better with a wide-angle lens. You’ll need it to photograph a small bathroom in one shot and to capture the whole state in one frame.
You can also incorporate a zoom lens ranging from 16-35mm or 24-70mm focal lengths to cover all your needs during a real estate shoot.
Flash:
like other fields of photography, light is your constant companion. In real estate photography, you need to get the big picture while showing the property’s features. Of course, you can benefit from natural or property lights, but recording all the details requires proper lighting, hence flashes.
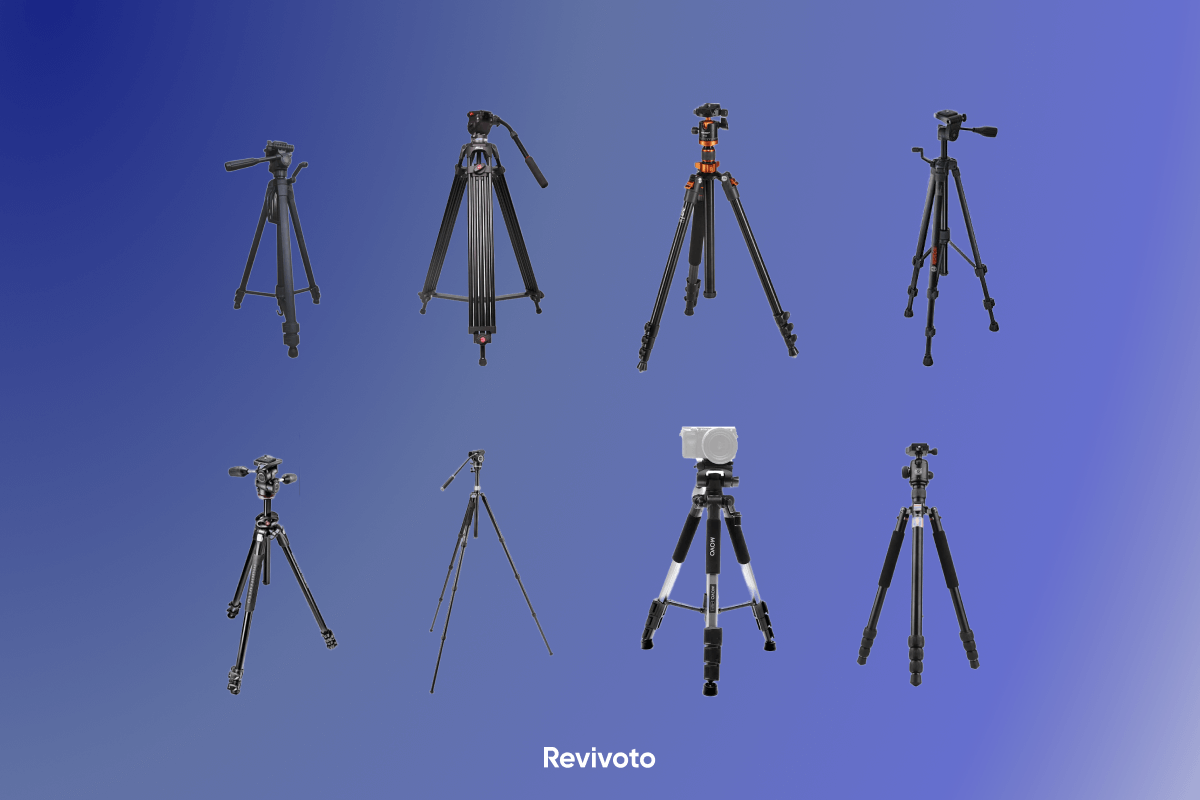
Tripod:
leveling the camera’s height and avoiding distortion justifies the presence of a tripod. Especially if you want to use HDR photography or get panoramic images, having a tripod is a must.
There are other gadgets that you can add to your inventory later:
Filters:
With all the photo editing possibilities, one may not need to consider using filters. Nevertheless, some photographers prefer to benefit from filters on the shooting day. Typical filters for real estate photography include Polarizer, UV, Neutral Density (ND), and Color adjusting ones.
Remote triggers:
having remote triggers for your camera and flashes gives you the liberty of moving around and capturing different exposures.
Drone:
Aerial photos are becoming a trend since they provide an overview of the estate. They function best with properties having extended outdoors and charming surroundings. You can easily show the vibe of the neighborhood in an overhead shot.
Make Lists (Pre)
Preparing is key to establishing your reputation as a reliable real estate photographer, and all preparations work best with a list.
Pre-shoot checklist for yourself:
A list of all the things you need to bring and need to do. It may seem straightforward, but make a list unless you want to start a shoot with a dead battery.
Pre-shoot checklist for the owner or the agent:
With real estate photography, indeed, less is more, so prepare a list of what must be stored, cleaned, and removed to save time on the shooting day.
Shooting day checklist:
Where do you want to start? How do you want to proceed? What rooms must you capture? All these matters need to be sorted out. Make a list to avoid repetition and confusion on the shooting day. At the property, based on the timing and the lighting, you will decide the priorities considering your list. You may also make alterations and suggestions to the agent or the owner regarding the rooms for listing images.
Post-production checklist:
The number of listing images, the editing process, timetable, and outsourcing are among the tasks that fall under this checklist.
Talk to Your Client (Pre)
You are supposed to show the potential of a property in the best way, so you’ll need to grasp its essence. No one knows this better than those who want to sell the place. Have a chat with them. See what’s in their mind. Inquire about the unique features of the estate. Explore the vibe and the clients they are chasing. The more information you gather about your subject, the more comfortable you’ll be on the shooting day as if you know each other from before.
Check the Weather (Pre)
A lot depends on the weather when it comes to real estate photography. It would be impossible to capture the best shots on a rainy or windy day. Everyone knows it’s not 100 percent, but set the shooting date considering weather conditions.
Choose the Best Time for Shooting (Pre or Shoot)
Generally, early to mid-morning and late afternoon provide the best light for indoor and outdoor shots. This may differ depending on the angle the property is faced, the way the interior gets lit, the season, and the location.
If it’s possible, you can check the property before the shooting day and choose the best time. Otherwise, you can decide on your priorities when inspecting the estate on the shooting day.
Inspect the Property (Shoot)
You’ve heard the pitch; now see how it matches the reality. Go around the estate, check every room, inspect the flow and feel the vibe. Every property is unique, and the “seen one, you’ve seen them all” rule does not apply here. Of course, you always have a kitchen, living room, bedroom, and bathroom, but they are one of a kind.
Additionally, each place has its little charms, like an adorable shelf or a cozy fireplace that can potentially captivate the homebuyers. Find them on your walk-through and try placing them in your shots.
While touring the place, imagine yourself as a future buyer. Examine the property through their eyes. That will give you a wholesome understanding of the property that reflects in your pictures.
Decide on Your Hero Shot (Shoot)
With suburbs and standalone houses, your prime picture is usually the outdoor image of the property, capturing the estate as a whole. This is the shot that is supposed to work as a hook to invite online browsers to check out the listing’s ad.
Depending on the setting, early bright light or twilight showcases the property at best. You can also take a day photo and use Day to dusk services to have a mesmerizing hero shot.
Declutter AMAP (Shoot)
Real estate photography is about the property, so any barrier between prospective buyers and the house must go. You need to declutter as much as possible, to make the images all about the estate.
You are a storyteller, and the main character is the house. If other characters exceed their supporting roles, you are telling the wrong tail.
Adjust Your Camera Settings (Shoot)
When it comes to your camera settings, you are the person behind the wheel, and you can bend its operation to your will. The main features requiring adjustment according to the environment are the following:
ISO:
Generally lower ISO level means less noise. But if you are dealing with dark spaces, you may have to raise your ISO level. You can raise ISO to 400 in low light circumstances.
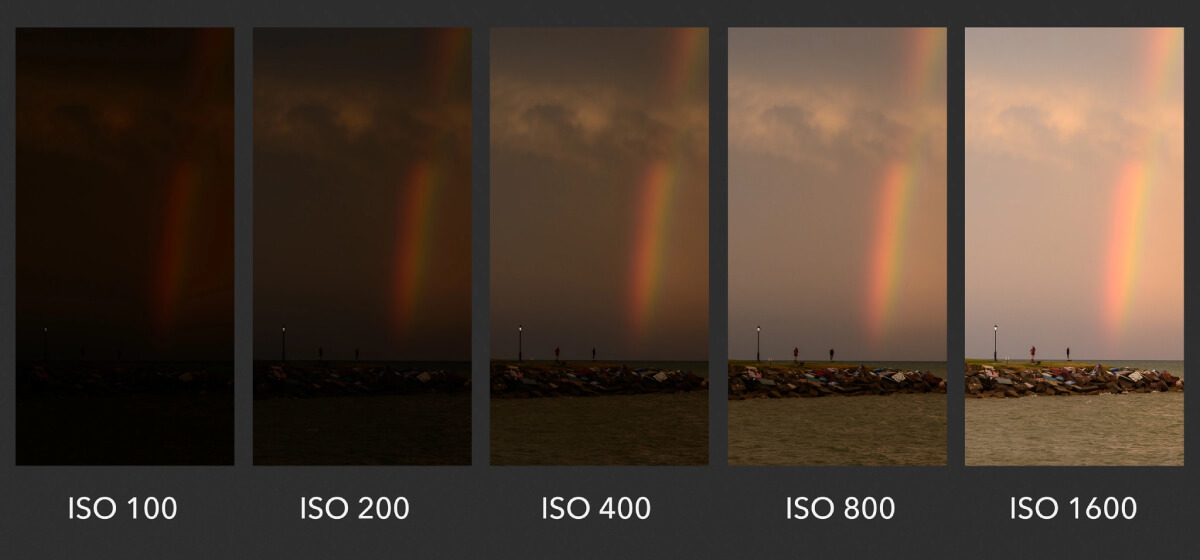
Source: photographylife.com
Aperture:
Since you want to capture all the aspects of each room, it’s best to go for f/8 to get the proper depth of the field.
Shutter Speed:
This is determined by the camera based on your ISO and Aperture. You can check it on your live view and adjust it if it’s necessary. If you are using a mirrorless camera, your viewfinder can also show you how your setting is working with the ambient light.
Pick the Right Camera Placement (Shoot)
The goal behind all listing images is to show the potential of the property. Where you place your camera plays a significant role in achieving that goal:
Height of the camera:
Real estate photography deals with unique subjects on each project. That is why there is no set recommended height for the camera. The objective is to avoid too much ceiling and too much floor. Put yourself in the homebuyers’ shoes and then check if your camera’s height can deliver the right visual content.
The angle of the camera:
Listings have different requirements when it comes to the right angle. You have the exterior that you’re supposed to capture the whole of the property. And there is the interior that has divided space through walls and doors.
Right angle for the outdoors:
Finding the right spot to capture the outdoor shots depends on various factors including the direction of the structure, size of the state, and surroundings. You can try out different and even unusual angles to see which fits each project.
Right angle for the indoors:
Often, the corners work well and enable you to fit the room in one frame. However, corner shots may result in distorted images, and they might show the room bigger than it is. Be mindful of that and always look for unique angles. Remember that your photos are supposed to guide the prospective buyers and show them the house; take your pictures from that angle.
Mind the Lines (Shoot)
There are multiple horizontal and vertical lines in real estate photography, and they have a tendency to curvature. Positioning your camera and leveling its height can assist you in keeping the lines in line. To settle this, take test shots and find the balance between too much ceiling and too much floor.
Bear in mind even if some distortions make their way into your shots, you can align them post-production.
Settle with the Light (Shoot)
In each project, you have different lighting. Due to each house’s unique architecture and structure, the lighting situation differs. So, starting the shoot, check the interior and exterior lights. That helps you decide which to shoot first and when you need flashes.
Consider the following:
- Turned-on lights make for a homey sensation, but you should check the property’s lighting and see if they provide leveled temperature. If not, turn them off and use natural light or flashes. Beware that you can turn the lights in the editing process.
- Open all the curtains and blinds to take advantage of natural light. If the house has an eye-catching view, take your shots with different exposures and replace the view in post-production.
- Use HDR photography to better capture the hidden angles of the interiors. You can merge different exposures during editing and get a well-lit image.
Budget for Editing (Post)
Various factors affect real estate photography, and even with thorough preparation, you can’t control everything, hence editing. Popular areas of editing with listing images are:
- Balancing white spaces
- Adjusting the Brightness and contrast
- Sharpening the image
- Adjusting the tone
- Enhancing water or grass
- Fixing lens distortions
- HDR Bracketing
- Removing blemishes and dust spots
- Replacing the sky
- Item Removal
- Turning the lights on
- Adding fire to the fireplace
- Replacing the image on the screens
- Virtual staging
It is up to you to decide whether to do this part yourself or outsource it using online services like image enhancement, item removal, and virtual staging. Either way, you need to set aside a part of your time or money for this phase.
Don’t underestimate the editing process. Real estate photography for beginners can be pretty challenging at the stardom of your career. Making room for editing relieves you of the pressure to take perfect pictures at the shoot.
As you gain more experience with each project, your photos become the best possible shots showcasing the property’s potential. Still, the perfect picture is made in post-production, where you clean up the images for the eyes of future buyers. That is where the magic happens.
Build Up Your Portfolio
Each project you do adds to your resume and will charm your future clients. So, put your heart and soul into it. You can offer discounts or a bit lower prices to attract customers. Just remember not to ruin the market for everyone by making it cheap.
If any friend or family plans to sell or rent their property, offer to do their photography for free or with an enticing discount. That will assist you in building up your portfolio at the beginning.
Real estate photography is an exceptional market where no two properties are identical. Be aware of this and showcase your ability to capture different estates in your resume.
Update Your Services
While you can start by offering your photography services in the real estate market, it is best to keep up with its demands and expand. Photos are still the top features for all listings, but the competitive nature of the real estate market and the shift to online multimedia because of the Pandemic have resulted in new demands.
These are the services that a real estate photographer can offer:
Aerial shots:
This includes photos and videos captured by drone.
Virtual Staging:
the process entails adding furniture and decoration to the images of the property.